Cloud Resume Challenge (Part 1)
Objective
The Cloud Resume Challenge is a multiple-step resume project which helps build and demonstrate skills fundamental to pursuing a career as a Cloud Engineer. The project was first published by Forrest Brazeal. who works at Cloud Guru, a cloud education company.
Taking The Challenge
My process in expanding my skill set to the cloud and specifically Azure has been a long and rewarding experience. Learning new skills and concepts, gaining hands-on experience through interactive training and labs, as well as obtaining my Azure certification (first of many).
However, when preparing to apply for positions building my portfolio with projects became a focus. Learning the skills was only half the battle, but being able to convey the skills learned through a project that has some real world application is where I believe the majority of the value came in as a interviewee.
The official website can be reached here.
Steps Taken
Certification
AZ-900 (Azure Fundamentals) is an introductory certification that orients someone with Azure. It offers a great lay of the land of the possibilities with the Cloud Platform. This is the first step I took.
HTML
Secondly if you are going to use a resume for the static website you need to convert it out of a word document and into HTML. Instead of doing it manually use a tool like this, so it will appear nicely in a webpage. However, in my case I will not be using my resume but a custom site I made.
CSS
Next, I created a CSS file for my website’s style.
1
2
3
4
5
6
7
8
9
10
11
12
13
14
15
16
17
18
19
20
21
22
23
24
25
26
27
28
29
30
31
32
33
34
35
36
37
38
39
40
41
42
43
44
45
46
/* display background color black on navbar scroll */
.navbarScroll.navbarDark {
    background-color: black;
}

/* hero background image */
.bgimage {
    height:100vh;
    background: url('heroImage.jpg');
    background-size:cover;
    position:relative;
}
/* text css above hero image*/
.hero_title {
    font-size: 4.5rem;
}
.hero_desc {
    font-size: 2rem;
}
.hero-text {
    text-align: center;
    position: absolute;
    top: 50%;
    left: 50%;
    transform: translate(-50%, -50%);
    color: white;
}

/* spacing on all sections */
/* #about, #services, #portfolio, #contact {
    margin-top: 4rem;
    padding-top: 4rem;
} */
#contact {
    padding-bottom: 4rem;
}
/* about section image css */
.imageAboutPage {
    width: 100%;
}

/* services section css */
.servicesText.card {
    height: 280px;
    cursor: pointer;
  }
Static website:
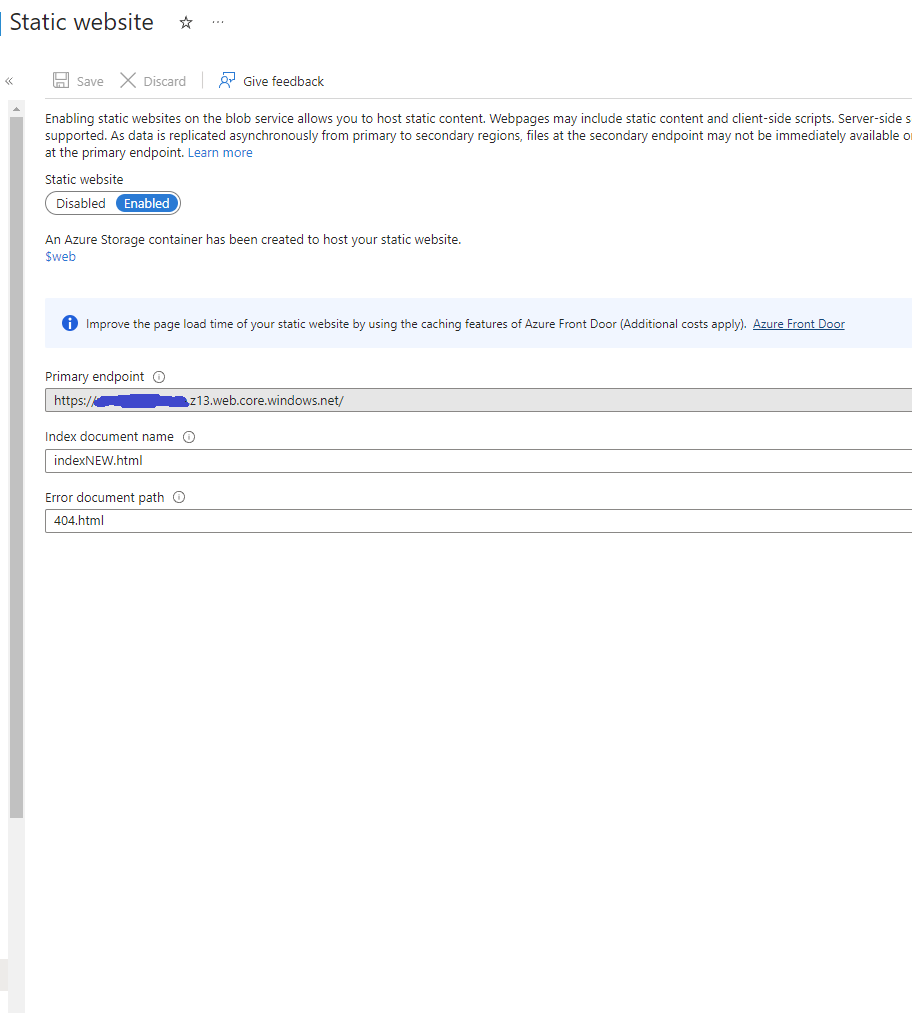
I deployed my resume/portfolio site online as an Azure Storage Static Site, this was pretty easy to do as the service just needs to be enabled with a index HTML file and an error document path.
The cloud resume challenge itself has extended capability beyond a site like this made with GitHub Pages, the rest of the steps will convey that hopefully.
HTTPS:
I converted the URL for the storage site from HTTP to HTTPS for security. I needed to use Azure CDN for this and use CDN Managed as the Certificate management type and TLS version 1.2.
DNS:
I pointed a custom domain name from godaddy.com to my configured Azure CDN endpoint. So instead of navigating to a URL like mysite.z13.web.core.windows.net/ it is much simpler to access from other devices or present the project itself.
For this, a CNAME is created which is a DNS record that maps a source domain name to a destination domain name. Azure Content Delivery Network routes traffic addressed to the source custom domain to the destination content delivery network endpoint hostname after it verifies the CNAME record. Then the custom domain is added to the CDN endpoint. Then I verified the domain since Azure Content Delivery Network caches the content in a public container.
Javascript:
I included javascipt code to include a visitor counter that displays how many people have accessed the site. Here is a helpful tutorial.
1
2
3
4
5
6
7
8
9
10
11
12
13
14
script src="https://ajax.googleapis.com/ajax/libs/jquery/3.6.0/jquery.min.js"></script>
	<script>
	$(document).ready(function() {
		var count = localStorage.getItem('visitorCount');
		if (!count) {
		count = 0;
		} else {
		count = parseInt(count);
		}
		count++;
		$('#visitorCount').text(count);
		localStorage.setItem('visitorCount', count);
  	});
	</script>
Database:
The visitor count was now stored in CosmosDB using Azure’s Table API. I used Serverless capacity mode so the resource cost was around .6 cents a month.
If your website gets a lot of traffic (hopefully it will!) then it will cost more than 6 cents for sure.
Current Status:
This project is a work in progress still the next steps are to…
- API: Communicate with this instead of directly to the cosmos db. Azure functions with an http trigger is needed.
- Python: This will be used instead of javascript in the azure function, it is better to practice more with the language and expand my use cases with the function.
- Tests: Testing will have to be written for the python code, most likely unit tests.
- IaaS: This will allow for configuring the resources without clicking around on the azure console. More command line could never hurt!
- CI/CD (Back end): I will create a github repo for my site, then utilize GitHub actions. So when I push an update to my python code the tests will be run and if they pass the ARM app will get packaged and deployed automatically.
- CI/CD (Front end): A second GitHub repo will be created, however this will be for my website’s code. When I push new code the storage account will be updated automatically
(Never commit credentials plz)

